Programming STM32 under Linux
Napisano dnia 16.08.2014 r. o godzinie 23:21
Autor: Piotr Sperka
Introduction
For a long time I have been trying to move microcontrollers programming to Linux which I use most of the time. While in the case of AVR I had no problem, as there is AVR-GCC (and for AVR I don’t have debugger tool), I had difficulties to find right environment for STM32. Under Windows I have used EmBlocks. Unfortunately it is not available for Linux, and for Code:: Blocks, on which EmBlocks is based, the plugin for debugging STM32 microcontrollers isn’t free. After searching and reading many guides, I’ve chosen Eclipse with additional plugins, OpenOCD and gcc-arm-embedded toolchain, which I also used under Windows. The same software set is also working under Windows, so I decided to describe the whole installation and configuration, which can be especially helpful for beginners. However, I assume that since you want to configure the entire IDE under Linux, you know at least the basics of its operation.
Preparations
First, we need to equip with the necessary software. We can download them directly from the pages below or from the software repository, if we find them. It’s your call how you install the software, but this is the way I did it. First of all I installed OpenOCD, which is the debugger. In this case I installed it from the repository in the 0.7.0 version (Ubuntu 14.04). However, if you want, you can download the source in the latest version from the site http://openocd.sourceforge.net. Then I downloaded the latest version of Eclipse (for C/C++ developers) from the https://www.eclipse.org website. In my case it was the “Luna” version. The last piece of software is toolchain, which you can find here: https://launchpad.net/gcc-arm-embedded. The next step is to unpack the downloaded packages of Eclipse and Toolchain. Then choose where you want to keep the unzipped apps. You can leave them in your home directory, however I decided to put them in the /opt directory. To do this, in the terminal I went to the location where I unzipped them and used this command:
sudo mv /opt/eclipse ./eclipse
Then I did the same for the toolchain. In addition, to be able to run eclipse directly from the terminal with the Eclipse command (without providing an additional path) I created a symbolic link:
sudo ln -s /opt/eclipse/eclipse /usr/bin/eclipse
Plug-in Installation
After these preparations you can configure Eclipse. First, we install two needed plugins: GNU ARM Eclipse GNU MCU Eclipse and EmbSysRegView. Installation instructions can be found on plugins websites.
First Project
Now it’s time to create your first project. Go to File → New → C Project. In the newly opened window enter the project name and select the type of project, in my case it was a STM32F2xx C/C++ project. In the next step choose the details of your project. My settings can be seen on the screenshot below.
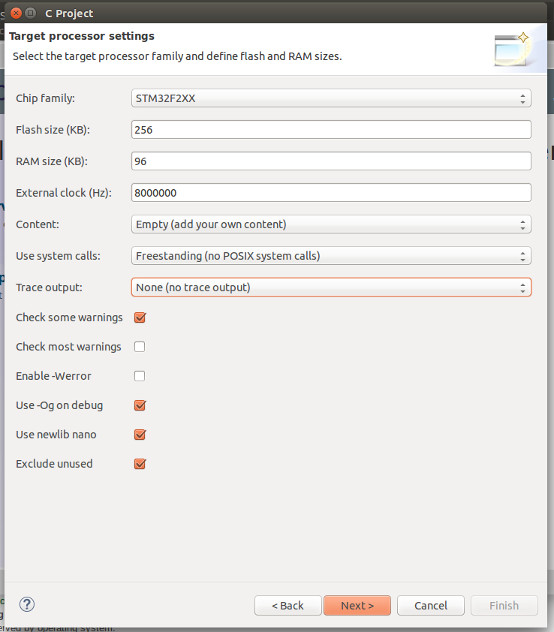
In the following steps, you can change location of individual parts of the project and the Debug/Release configuration settings. I left the default. In the last step, select Toolchain and select its path. In my case it was:
GNU Tools for ARM Embedded processors (ARM-none-Eabi-GCC)
/opt/gcc-arm-none-eabi/bin
After clicking Finish, you should see the finished project with the main. c file created. At this point, if you have done everything correctly, the project should be compiled through Project → Build All. In the tab Console you can find the compilation logs, and in the tab Problems possible warnings and errors.

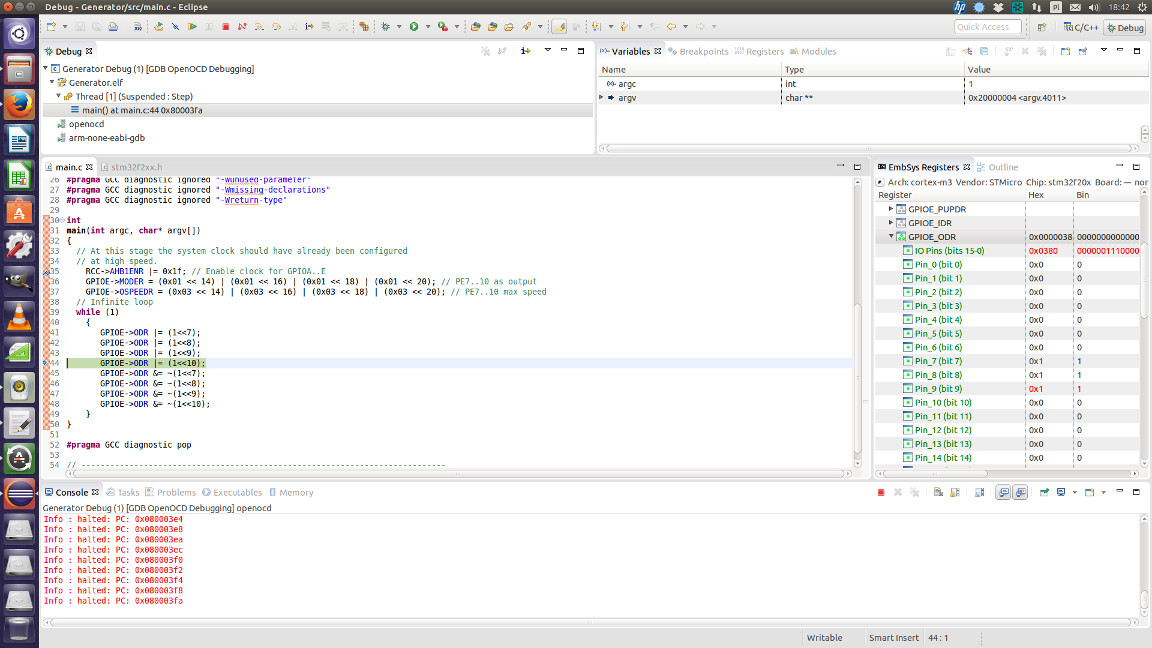
If the compilation was successful (as in the above screenshot), you can write a simple program and configure the debugger. In my case, the program toggled LEDs (it is visible on one of the screenshots).
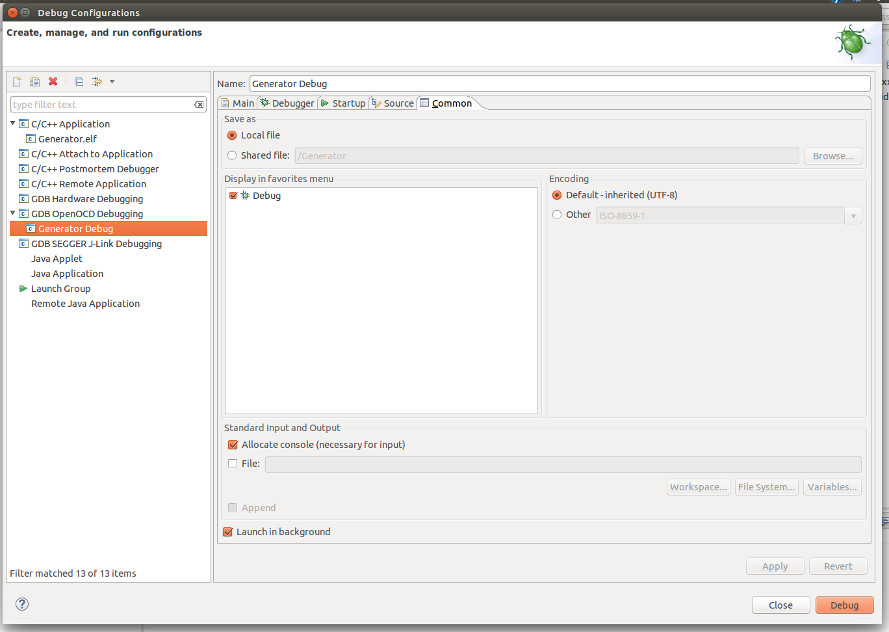
Debugger Configuration
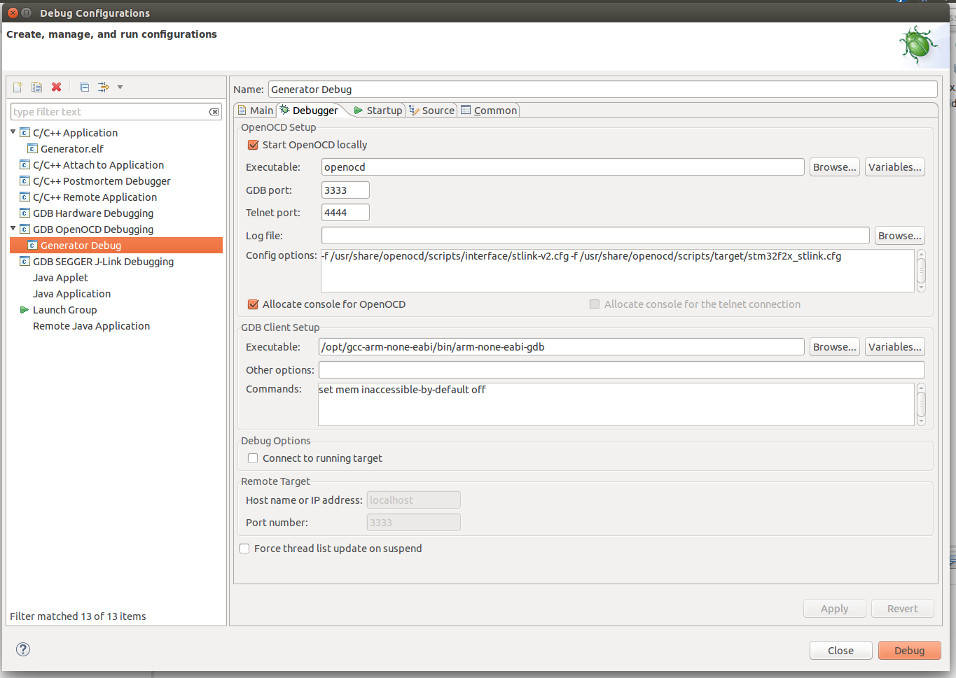
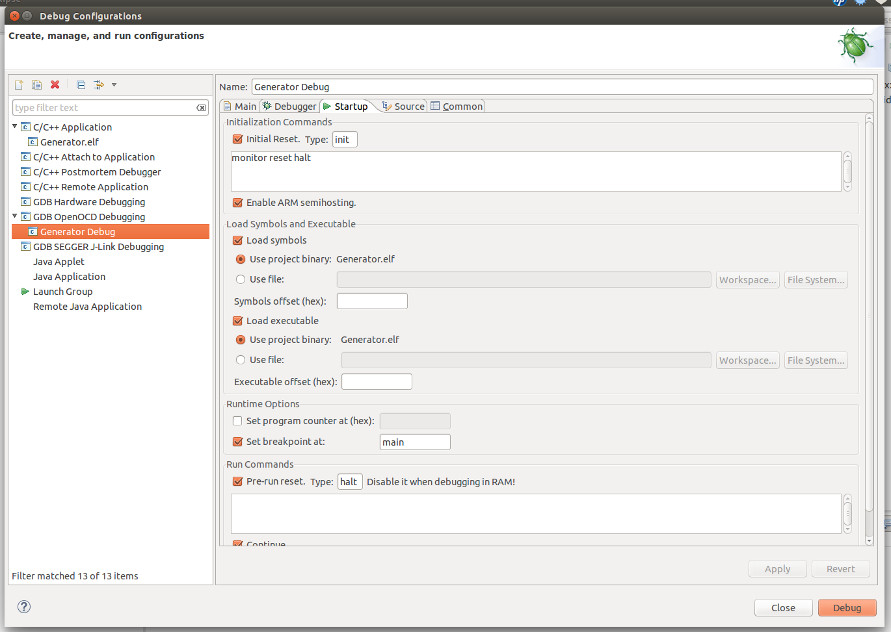
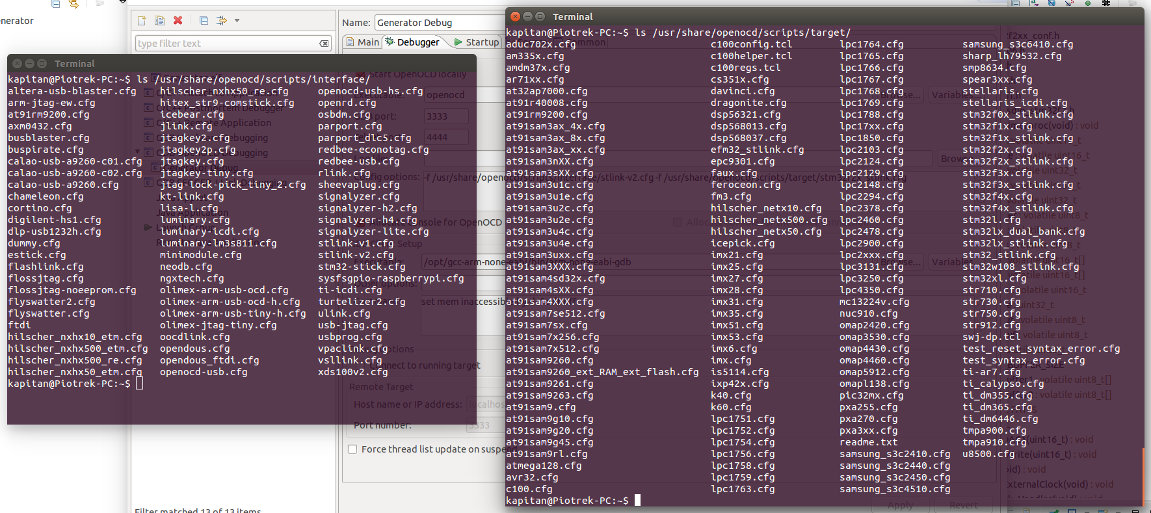
Go to Run → Debug configurations… Right click GDB OpenOCD debugging and then click New. On the following screenshots you can find all windows where I changed anything. In Debug → Config options, you should provide the path to files associated with your debugger (in my case ST-LINK v2) and a microcontroller. On one of the following screenshots you can find all configurations available in my OpenOCD installation. Finally, click Apply and run debugging by clicking Debug. If everything went well the application will switch to debug view.
The end
If you have done everything correctly, as a result you have a fully functional environment for programming and debugging STM32 microcontrollers under Linux, completely free of charge.